Complete Guide to Raising Ohkuwa with Fungal Substrate Bottles: From Selecting Brands to Replacement Timing
Explains how to raise Ohkuwa larvae and grow them large using fungal substrate bottles. Introduces fungal types, brand selection, appropriate sizes, and how to determine replacement timing.
Key Takeaways
Explains how to raise Ohkuwa larvae and grow them large using fungal substrate bottles. Introduces fungal types, brand selection, appropriate sizes, and how to determine replacement timing.
Related Species

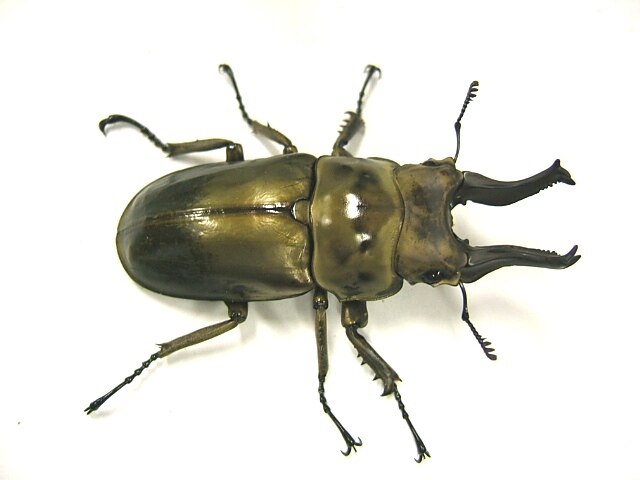
In Ohkuwa larva rearing, fungal substrate bottles have become established as the most effective rearing method. Through proper selection and management of fungal substrate bottles, it is possible to aim for the emergence of large individuals that are difficult to achieve with mat rearing. This article provides detailed explanation of Ohkuwa fungal substrate bottle rearing, from brand selection to replacement timing.
Basics of Fungal Substrate Bottles: Fungal Types and Substrate Types
Fungal substrate bottles are cultivated mushroom mycelium using hardwood sawdust as a medium. Stag beetle larvae grow large by efficiently absorbing nutrients through consuming the sawdust (mycelium) decomposed by this mycelium. In nature, stag beetle larvae grow by eating rotted wood decomposed by mushroom fungi, so fungal substrate bottles artificially recreate this environment.
There are mainly three types of mycelium: King Oyster Mushroom strain, Kawaratake strain, and Oyster Mushroom strain.
- King Oyster Mushroom strain (particularly the strains called "King Oyster Mushroom" and "DG Mushroom") has the most proven track record in Ohkuwa rearing, and many breeders use it
- Kawaratake strain is suited for Tarandus stag beetles and golden stag beetles, but is also usable for Ohkuwa
- Oyster Mushroom strain tends to have slightly better mycelium longevity, but is said to be slightly inferior to King Oyster Mushroom strain in terms of size increase
The tree species used in the sawdust substrate is also important. Kunugi, konara, and beech are common, with kunugi showing a good feeding response in Ohkuwa. Fungal substrate bottles made with fine-particle sawdust are easy for larvae to consume and tend to show faster growth rates, but care should be taken as mycelium degradation also occurs faster.
Moisture content is also a checkpoint. Appropriate moisture content is around 50–55%, and if water seeps out when the bottle is tilted, there is too much moisture. Fungal substrate bottles with excess moisture have increased risk of oxygen depletion and contaminating organism proliferation.
Selecting Fungal Substrate Bottle Sizes and Stage-Based Management
In Ohkuwa larva rearing, the basic approach is to change the fungal substrate bottle size according to the larva's growth stage. Guidelines are as follows:
| Target | Stage | Bottle Size |
|---|---|---|
| Basic | 1st instar to early 2nd instar | 800ml |
| Basic | Late 2nd instar to 3rd instar | 1400ml |
| Male (when aiming for large size) | 3rd instar | 2300ml |
| Female | 1st bottle | 800ml |
| Female | 2nd bottle onwards | 800ml (sufficient in most cases) |
| Female (when aiming for large size) | 2nd bottle | 1400ml |
From 1st instar to early 2nd instar, use an 800ml bottle, and switch to a 1400ml bottle from late 2nd instar to 3rd instar. Particularly for males aiming for large size, using a 2300ml large bottle for 3rd instar larvae ensures sufficient food and living space.
Female larvae are small-bodied, so an 800ml bottle for the 1st bottle and 800ml for subsequent bottles is sufficient in most cases. When aiming for large females, a 1400ml bottle may be used for the 2nd bottle, but for females, a 2300ml bottle risks having excess mycelium that deteriorates.
Measure the head width (lateral head width) of the larvae being introduced to determine the instar. Guidelines for head width are as follows:
- 1st instar: head width around 2mm
- 2nd instar: head width 4–5mm
- 3rd instar: head width around 8–12mm
Head width measurement can be done with calipers or a ruler. Placing a large 3rd instar larva in a small 800ml bottle will deplete the mycelium quickly, resulting in malnutrition and stunted growth, so care is required.
A standard cycle is 3–4 bottles per larva. Introduce at 1st instar into the fungal substrate bottle, exchange for a new bottle approximately every 3 months, and manage through pupation and emergence in the final bottle.
Determining Fungal Substrate Bottle Replacement Timing
Determining when to exchange fungal substrate bottles is a critical judgment that greatly influences rearing results. Exchange guidelines are as follows:
- Feeding marks ratio: When feeding marks (the brown parts eaten by larvae) seen from outside the bottle reach 70–80% of the entire bottle, it is time to exchange
- Time guideline: Approximately 2.5–3 months from introduction
- At 20°C management: 3 months is the exchange guideline
- At 25°C management: 2 months is the exchange guideline
Carefully observe feeding marks on both the side and bottom of the bottle. Leaving the bottle until it is completely brown throughout causes complete mycelium degradation and drastic reduction in nutritional value, negatively affecting larval growth. As larval activity and mycelium consumption rate change with rearing temperature, exchange intervals shorten in higher-temperature environments.
There are also times when you must not exchange bottles. If the larva begins creating a pupation chamber (a room for pupation), absolutely do not exchange. The pupation chamber is visible as an oval hollow. Destroying the pupation chamber causes stress that can result in pupation failure or emergence defects in the larva. Once a larva begins creating a pupation chamber, observe it through emergence as is.
Exchange work involves carefully breaking apart the old bottle with a spoon or spatula and removing the larva. Avoid touching the larva directly with your hands; move it on a spoon. Dig a hole on the surface of the new bottle where the larva can enter, and introduce it gently. Right after exchange, slightly loosen the bottle cap to ensure oxygen, and place it in a dark location with minimal vibration.
Temperature Management and Fungal Substrate Bottle Storage
Temperature management in fungal substrate bottle rearing is important for both larval growth and maintaining mycelium quality. The appropriate temperature range for Ohkuwa larvae is 18–25°C, but when aiming for large size, managing in the 20–23°C range is ideal.
One temperature management technique involves using "temperature shock." Temporarily raising the temperature to around 25°C during the feeding period of 3rd instar larvae increases appetite and can accelerate body weight gain. However, maintaining high temperature causes faster mycelium degradation, so return to the original temperature after 2–3 weeks.
Store purchased fungal substrate bottles in a cool, dark place until use. Storing in a refrigerator vegetable compartment (5–8°C) suppresses mycelial activity and maintains quality for approximately 1–2 months. However, do not place bottles with larvae in them in a refrigerator. This storage method is only for unused bottles.
Mushrooms sometimes grow on the surface of fungal substrate bottles. This is caused by temperature changes (particularly sudden drops) causing the mycelium to form mushroom fruiting bodies, and there is no problem with the quality of the fungal substrate bottle. If mushrooms block the bottle's air vents, there is a risk of oxygen depletion, so remove them if found.
Management Through Emergence and Pitfalls of Fungal Substrate Bottle Rearing
Fungal substrate bottle rearing has several pitfalls. The most common failure is a phenomenon called "thrashing." The 3rd instar larva moves violently inside the bottle, digging up the mycelium it has eaten, which causes body weight to decrease. The main causes of thrashing are as follows:
- Mycelium degradation
- Oxygen deficiency
- Sudden temperature changes
- Preparation for pupation
Check the condition of the mycelium frequently and maintain environmental stability.
Another point to note is variation in fungal substrate bottle quality. Even with the same brand, there can be variation in mycelium coverage and moisture content by lot. Select products from reliable manufacturers and always check the condition when it arrives. Bottles in which the mycelium has not fully colonized (few white areas) or bottles with water accumulated at the bottom should be avoided.
After emergence, wait for the adult's body to fully harden inside the pupation chamber (1–2 months after emergence) before removing it. Digging it out while the body is still soft can cause wing deformation. Even if the mycelium is completely degraded and smells, as long as the pupation chamber is maintained, there is no problem.
On BreederDirect, you can purchase large Ohkuwa individuals directly from breeders who have successfully raised many. By asking which fungal substrate bottle brands and rearing temperatures the breeders use, you can more easily reproduce the breeder's results in your own rearing. Only when both bloodline and rearing environment come together are large individuals born, so communication with breeders is extremely valuable.