Coral Photography Techniques | Camera Settings and Lighting to Capture Fluorescent Colors Beautifully
Explains techniques for capturing coral fluorescent colors beautifully in photographs. Introduces blue light filters and white balance settings.
Key Takeaways
Explains techniques for capturing coral fluorescent colors beautifully in photographs. Introduces blue light filters and white balance settings.
Accurately reproducing the fluorescent colors of corals in photographs is an important skill for both hobbyists and sellers. While the colors of corals shining fantastically under blue LED may look beautiful to the naked eye, they often end up looking bluish and washed out when photographed by camera—I'm sure many of you have experienced this.
In this article, considering the current state of equipment as of 2026, we'll thoroughly explain equipment selection, camera settings, actual shooting techniques, and post-processing tips to faithfully and beautifully capture the fluorescent colors of corals. From those photographing coral for the first time to breeders aiming for higher-quality product photos, we'll provide practical content that you can implement right away.
Why is Coral Photography Difficult? | Understanding the Blue Light Problem
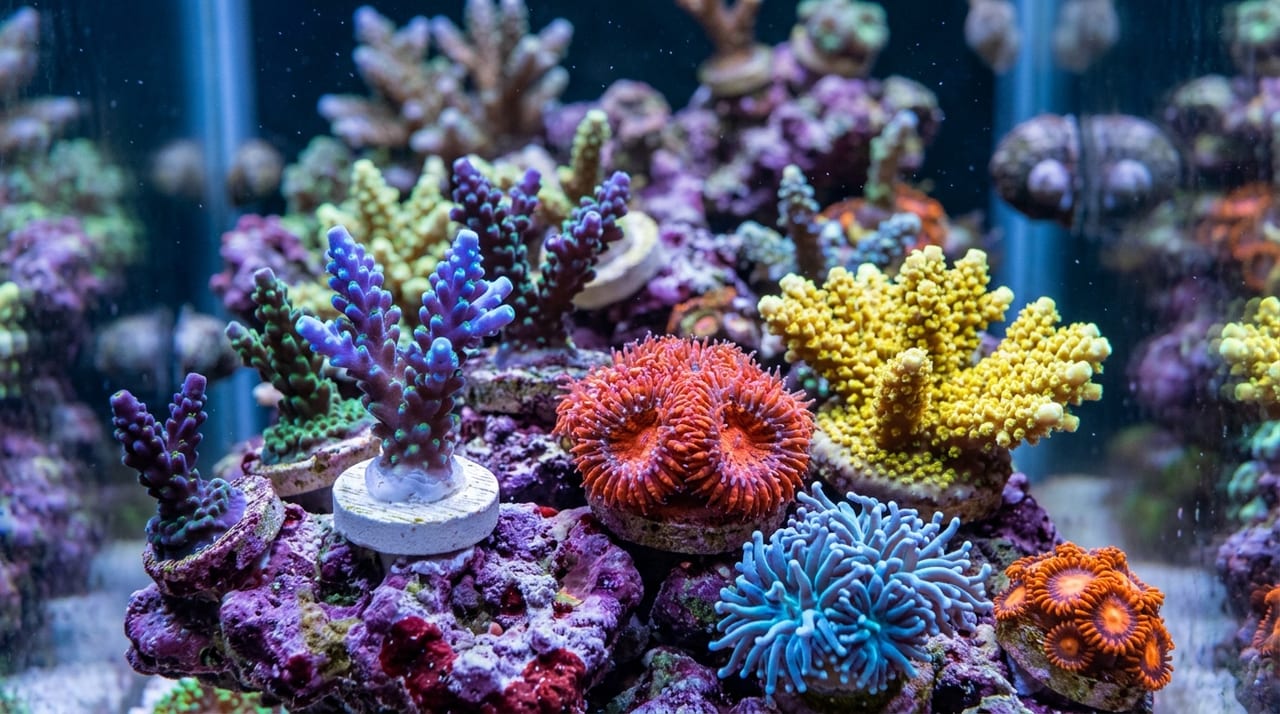
Blue LEDs commonly used in coral tanks (around 420–460 nm) excite the fluorescent proteins in corals, bringing out vivid fluorescent colors like green, orange, and pink. However, this blue light is "overly intense monochromatic light" for a camera's image sensor, and auto white balance cannot fully compensate, causing the entire photo to take on a bluish cast.
Additionally, since coral fluorescent colors are produced only under blue light, switching to normal white light for photography causes the fluorescence to fade, resulting in a dull, washed-out appearance. To capture beautiful fluorescent colors, you need a seemingly contradictory approach: using blue light while effectively removing that blue. The solution to this problem is the "orange filter."
In recent years, smartphones have enhanced AI-powered automatic scene correction features, but this can backfire—the system may judge underwater fluorescent colors as "unnatural" and automatically adjust saturation and hue. Be conscious of using professional shooting mode or RAW shooting mode to disable AI correction.
Essential Gear to Start With | How to Choose Filters and Lenses
Orange Filter is a Must-Have
By attaching an orange (amber) filter in front of your lens, you can cut blue light while allowing only the coral's fluorescent colors to pass through. This makes it possible to capture the vivid fluorescent colors you see with your naked eye in your photographs.
- For SLR and mirrorless cameras: Orange filter sets specifically designed for aquarium photography are sold by various manufacturers. They come in different types such as screw-on or magnetic, so choose one that matches your lens diameter and filter size.
- For smartphones: Clip-on orange filters are available at affordable prices and are ideal for those wanting to get started easily. Universal types compatible with both iPhone and Android are mainstream, making them a great option for beginners to try.
Macro Lens for Close-Up Photography of Polyps
The beauty of corals also lies in the delicate structure of their polyps (tentacles). Standard lenses make it difficult to judge distance, so using a macro lens or extension ring allows you to get closer to the subject and capture fine details clearly. For smartphones, clip-on macro lenses or the macro mode built into your device are also effective options.
Camera Settings Tips | Manual Control to Regulate Color
Relying on auto mode can cause your camera to automatically adjust white balance and exposure, undoing the effect of your filter. Manually adjusting the following settings is the shortest path to high-quality photographs.
White Balance
Avoid auto white balance (AWB) and manually set it to 4,500–6,000K. Light passing through an orange filter tends toward warmer tones, so the trick is to start at the lower end (around 4,500K) and adjust to match the actual colors. If shooting in RAW, you can correct it in post-processing, but matching the color as closely as possible at the time of shooting makes editing easier.
ISO Sensitivity
Use ISO 100–400 as a guideline. Coral tanks are often dark environments, but raising ISO too high increases noise on the screen, making the delicate fluorescent colors appear grainy. When exposure is insufficient, it's best to compensate by adjusting aperture or shutter speed. While recent mirrorless cameras have improved high-ISO performance, keeping ISO low is still the safest approach to preserve the fine grain of fluorescent colors.
Shutter Speed
1/60–1/125 second is a standard guideline. Because water currents cause coral polyps to sway slightly, shutter speeds that are too slow result in motion blur. On the other hand, setting it too fast causes underexposure, so try around 1/60 second using a tripod.
Aperture (F-Number)
F5.6–F8 is a comfortable range to work with. Setting it too wide (such as F2.8) results in a shallow depth of field, narrowing the range where focus is sharp. Adjust based on your purpose: F8 or higher to capture an entire colony, or a wider aperture to make a specific polyp stand out.
Shoot in RAW Format
We strongly recommend shooting in RAW format rather than JPEG. RAW preserves image data uncompressed, allowing you to make significant adjustments to color temperature, exposure, white balance, and other parameters in post-processing. In recent years, more smartphone models and apps support RAW (DNG format) capture, and this degree of flexibility is extremely important for expressing the subtle nuances of fluorescent colors.
Setting Up Your Shooting Environment | Clean Glass and Light Control are Key
No matter how well you configure your camera settings, quality won't improve without a properly prepared shooting environment. Keep the following points in mind before you start shooting.
- Clean the glass surface: Algae and mineral deposits on the tank's glass or acrylic significantly reduce photo clarity. Wipe carefully with a soft cloth or magnetic cleaner.
- Block external light: Room lighting and natural light from windows can distort the color temperature of blue LED. Close curtains, turn off room lights, and shoot using only the LED light from the tank for ideal results.
- Use a tripod: Handheld shooting in this environment is prone to blur, so use a tripod to keep the camera steady. For smartphones, a compact tabletop tripod or clamp-style stand is effective.
- Manage reflections: If your camera or yourself reflects on the glass surface, you can minimize it by using a lens hood or positioning the camera as close to the tank as possible. Creating a simple DIY lens hood by draping a dark cloth around the lens area is also effective.
- Check lighting schedules: Many LED lighting systems have schedule control functions. Identify the time when blue light intensity is at its peak and schedule your shooting then for stable colors.
Post-Processing Tips | Aim for Color Reproduction Close to Reality
When editing RAW data from your shoot using editing software or smartphone apps, keep these points in mind.
- Color temperature and tint: If the photo has an orange cast from the filter, lower the color temperature; if it has a green cast, adjust the tint. Comparing with the actual coral is the most reliable method.
- Keep saturation and vibrancy modest: Because fluorescent colors are already vivid, significantly increasing saturation results in unnatural-looking images. Move the "vibrancy" slider only 5–15 points or so, and avoid excessive processing.
- Balance sharpness and noise reduction: Apply slight sharpening to bring out fine details of the polyps, and use noise reduction if noise is prominent. However, overdoing it results in an unnatural texture, so exercise restraint.
- Crop to refine composition: If unwanted equipment, cords, or adjacent corals are in the frame, crop to center and highlight your main subject.
- Be cautious with AI processing: Modern editing apps include AI-powered automatic correction and saturation enhancement features, but applying them too strongly often creates colors that diverge from reality. As a product photo, "less is more" builds buyer confidence.
BreederDirect's Safe and Reliable System
When listing coral on BreederDirect, photo quality directly impacts buyer trust. Photographs with color reproduction close to reality prevent problems like "the item I received looked different than expected" and lead to positive reviews and repeat purchases.
As a platform connecting breeders and buyers directly, BreederDirect values transparent transactions. By photographing from multiple angles—front, side, and close-up of polyps—and posting both fluorescent photos under blue light and natural-color photos under white light, buyers can judge the specimen's condition more accurately.
Beautiful photography is not merely about "appearance"—it's an important communication tool for honest transactions. We hope you'll apply the techniques introduced here when listing your coral and make your coral sales even more fulfilling.