Complete Guide to Setting Up a Freshwater Shrimp Tank | Substrate, Filter, and Aquatic Plant Selection and Setup Procedures
A comprehensive guide to aquarium setup for healthy freshwater shrimp. Covering substrate soil, filter types, aquatic plant introduction, pilot fish, and cycling period—bringing together the key points for creating a reliable environment.
Key Takeaways
A comprehensive guide to aquarium setup for healthy freshwater shrimp. Covering substrate soil, filter types, aquatic plant introduction, pilot fish, and cycling period—bringing together the key points for creating a reliable environment.
Freshwater shrimp have grown in popularity among aquarium enthusiasts for their beautiful coloration and the pleasure of breeding. However, compared to fish, shrimp are sensitive to changes in water quality, and the environment setup in the early stages of tank cycling has a major impact on long-term successful care. This article provides a comprehensive guide to setting up a freshwater shrimp tank from scratch, covering substrate and filter selection, aquatic plant introduction, and achieving water stability.
✍️
BreederDirect Editorial
The BreederDirect editorial team specializes in care information for animals, covering veterinary care and breeding to deliver beginner-friendly guides.
Find Tropical Fish on BreederDirect
Buy directly from verified breeders
Browse Related Listings
Find Tropical Fish listings related to this article on BreederDirect. Buy directly from verified breeders.
Related Tools
Related Articles
Browse by Category
🪸Coral
🐠Marine Fish
🐟Tropical Fish
🐡Goldfish
🐟Medaka
🦎Reptiles
Share
Tank Size Selection
For a shrimp-dedicated tank, a 30–45 cm cube aquarium (capacity approximately 15–80 L) is a practical standard choice. Small tanks are prone to rapid water quality changes due to their lower water volume, so we recommend at least a 30 cm cube (27 L) for beginners.
The greater the water volume, the more stable the water quality will be for shrimp. For example, a standard 60 cm tank (approximately 60 L) provides buffer capacity against minor water change mistakes and temperature fluctuations. On the other hand, a tank that is too large requires significant time and cost to establish, so a 45–60 cm class tank is a practical initial choice.
Additionally, shrimp are prone to escaping. Avoid tanks with large gaps in the lid, and use a mesh lid or dedicated cover to prevent escape.
Substrate (Soil) Selection and Setup Method
For freshwater shrimp, particularly Neocaridina species (Cherry shrimp) and Caridina species (Bee shrimp), the suitable substrate differs.
Neocaridina Species (Prefer Neutral to Slightly Alkaline)
Large grain or gravel substrate is acceptable
If using active soil that maintains slightly acidic conditions, pay attention to buffering capacity
When using soil, adjust with slightly hard water to prevent pH from dropping too low
Caridina Species (Prefer Slightly Acidic, Soft Water)
Active soil (with pH-lowering and water-softening functions) is nearly essential
Select shrimp-specific products such as Project Soil or Master Soil
Layering to a depth of approximately 5–7 cm promotes bacterial colonization
Most soil products do not require rinsing before use, but if using substrate gravel, rinse thoroughly before adding it to the tank.
Filter Types and Selection Criteria
When selecting a filter for a shrimp tank, preventing juvenile shrimp from being sucked in is the top priority.
Sponge Filter (Most Recommended)
The fine pore structure of the sponge prevents juvenile shrimp from being sucked in, and it excels at biological filtration by promoting bacterial growth. Use it in combination with an air pump, and maintain filtration capacity through regular sponge cleaning. Installing multiple units provides additional stability.
External Filter (for Medium to Large Tanks)
Offers high physical and biological filtration capacity, but you must attach a dedicated sponge cover to the strainer (intake) to prevent juvenile shrimp from being sucked in. While juvenile shrimp can sometimes survive inside the filter, there is also a risk of being caught by the pump.
Undergravel Filter
The entire substrate serves as filter media, achieving stable water quality. Combined with soil, it creates an environment ideal for a shrimp-dedicated tank, but be aware that substrate cleaning and resetting require significant effort.
Air-Driven Internal Filter
Inexpensive and excellent for oxygen supply, but has less filtration capacity than a sponge filter. It is most practical to use it as a supplementary filter.
Aquatic Plant Introduction and Bacterial Colonization
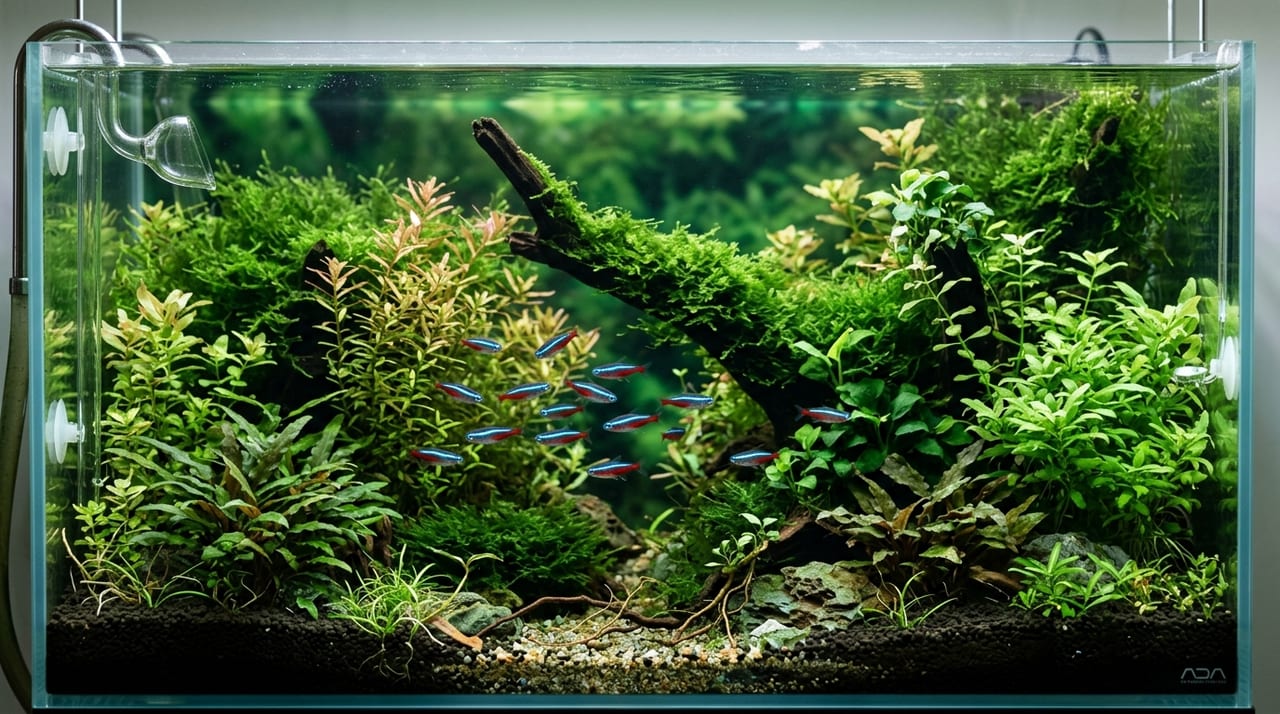
The main purposes of adding aquatic plants to a shrimp tank are threefold: hiding places, spawning substrate, and a microorganism growth base. Moss varieties such as willow moss, Java moss, and South American willow moss provide hiding places for shrimp and improve juvenile shrimp survival rates.
However, if residual pesticides remain on aquatic plants, shrimp may die. Bee shrimp in particular are sensitive to pesticides. Take the following measures when introducing aquatic plants.
Use tissue culture aquatic plants (pesticide-free and safest)
Perform "pesticide removal treatment" on conventional aquatic plants by soaking in water for 2–4 weeks to remove pesticides
Before adding shrimp, first introduce pesticide-test fish such as medaka or goldfish to confirm there are no problems
Additionally, floating plants (duckweed, frogbit, dwarf frogbit) also suppress algae growth from excess nutrients and serve as effective hiding places for juvenile shrimp.
Cycling Period and Water Stability Key Points
Before introducing shrimp, tank cycling to establish bacteria is necessary. This typically takes 3–6 weeks.
Equipment Setup: Install the tank, soil, filter, and aquatic plants, and fill with dechlorinated water
Bacteria Inoculation: Add commercially available bacterial products (PSB, Super Baikomy) at the recommended dosage
Ammonia Source Addition: Use a small amount of food or decaying plant leaves to start the nitrite and nitrate cycle
Water Quality Testing: Confirm that ammonia and nitrite have reached zero and only trace amounts of nitrate are detected
Shrimp Introduction: After water quality stabilizes, start with a small number (5–10 shrimp)
Shrimp introduction via drip acclimation (slowly adjusting temperature and water quality over 1–2 hours) is recommended. Sudden water quality changes can be fatal to shrimp.
Summary
The most important thing in setting up a freshwater shrimp tank is not to rush. Introducing shrimp into a tank where bacteria have not been adequately established risks total loss from ammonia or nitrite poisoning. By carefully preparing in stages—from substrate, filter, and aquatic plant selection through water quality testing—you can create an environment where shrimp will thrive and remain healthy long-term.
BreederDirect allows you to purchase healthy freshwater shrimp directly from breeders. Once your tank setup is complete, be sure to bring home your favorite shrimp.